Chemistry Add-In for Microsoft Word

CML is Cool

  • Home
  • History
  • Download
  • Consultancy
  • Sponsors
  • Under the Hood
  • News
  • Shop
    • My account
    • Basket
  • Support ▾
    • Knowledge Base
    • Usage
    • FAQs
    • Tutorials

Draw Chemical Reactions Easily and Quickly with Chem4Word!

26th March 2023 by Clyde Davies

ACME draws a reaction

This is first of a series of simple guides to getting the best from Chem4Word.

Below is a video, we have produced, to demonstrate the subject of this post.

Draw a Simple Reaction

For now, you cannot download reactions or load them from libraries. So, you must draw reactions yourself.

Chem4Word makes this very easy! You can draw a reaction like drawing any chemistry.

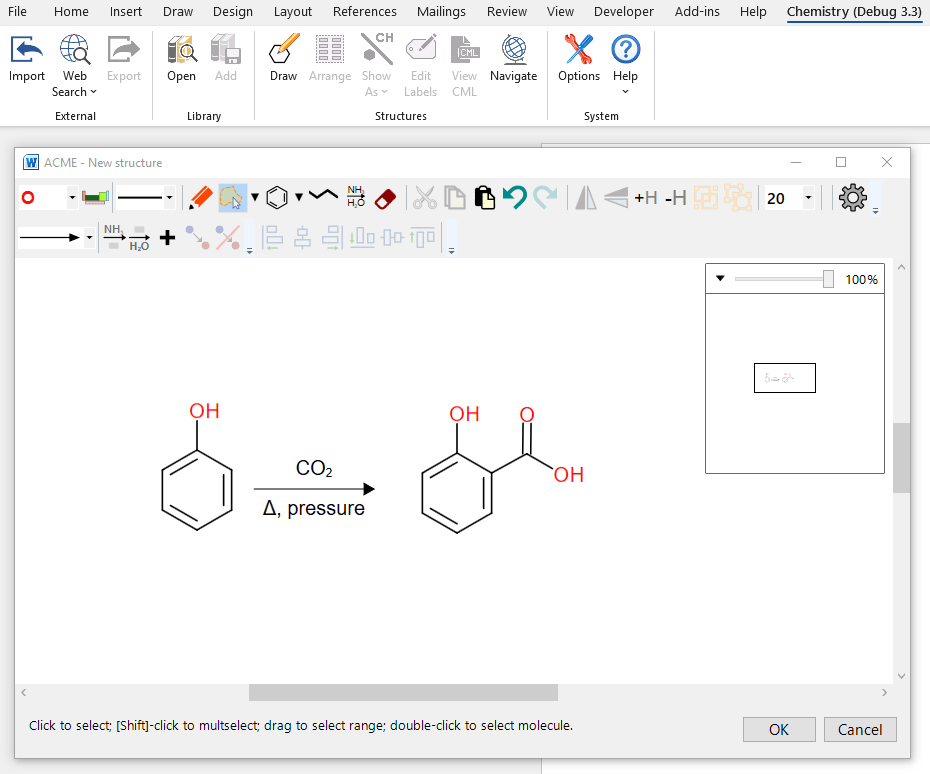
Use ACME to draw reactions. Start by drawing out the reactants and products.

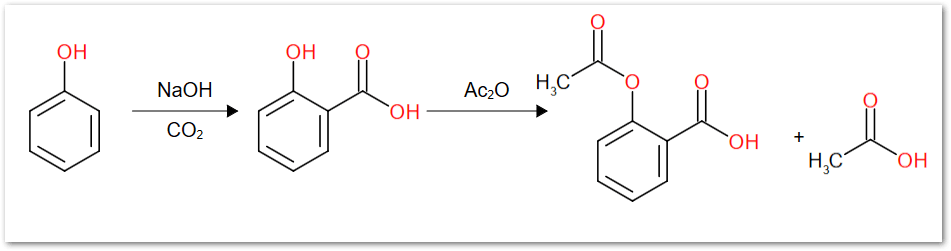
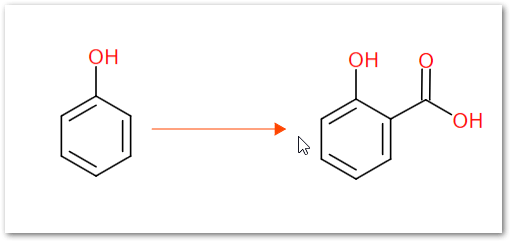
Here, I’ve chosen the Kolbe-Schmitt reaction. This is the first step in making aspirin. Carbon dioxide reacts with phenol and sodium hydroxide under pressure and salicylic acid is the product. It’s the first step in this scheme:

Draw the Reactant and Product

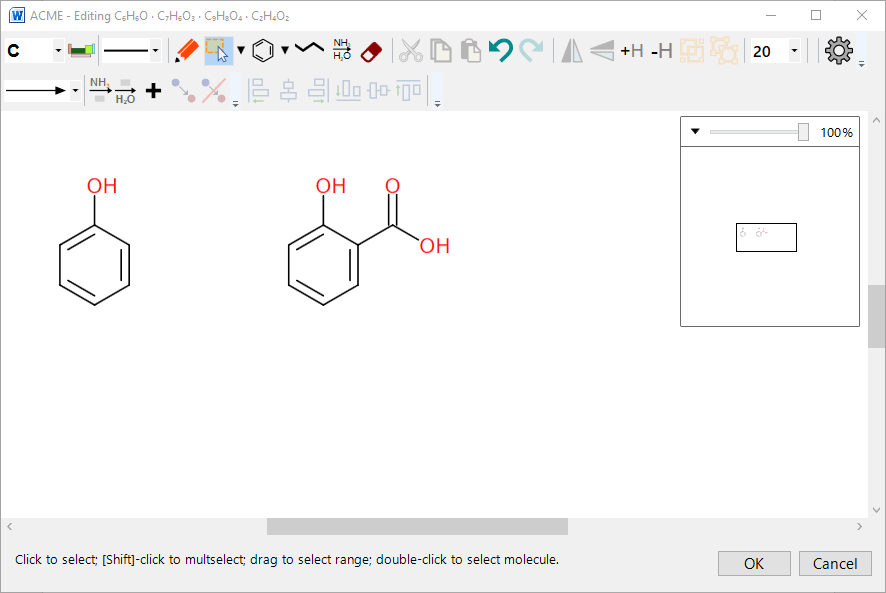
Use ACME to draw the phenol reactant and salicylic acid product. You can save time by cutting and pasting the phenol skeleton:

Reactant and product

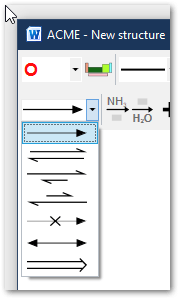
Draw a Reaction Arrow

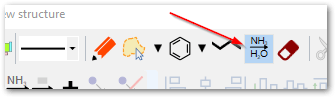
The next step is to draw a reaction arrow. The reaction arrow button on the toolbar puts ACME into arrow drawing mode:

The reaction toolbar below allows you to choose an arrow type from the dropdown. I’ve left it as the standard reaction arrow for now. Click the dropdown to display all the arrow types:

Click and drag to draw an arrow

You can change the arrow type by clicking on it to select it, then choosing a new arrow from the dropdown:

Add Reagents and Conditions

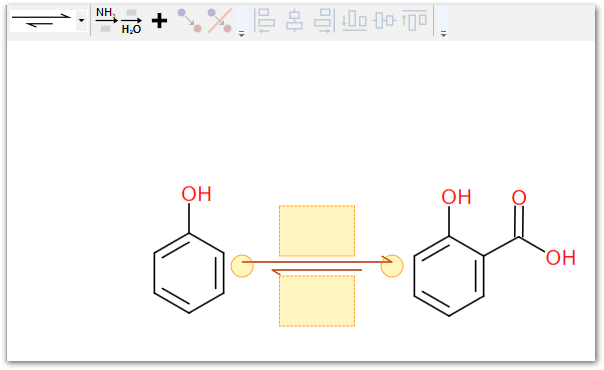
You’ll have noticed the orange blocks that appear above and below the arrow. These contain the reagents and conditions.
By convention, reagents are placed above the arrow, and conditions below it. ACME doesn’t enforce this rule so you can put them where you like.

You can type in these blocks in one of two ways:

  • Click on either the reagents or conditions button;
  • Double-click an orange block.

ACME switches to editing the reagents/conditions: you can type whatever you wish into this box.

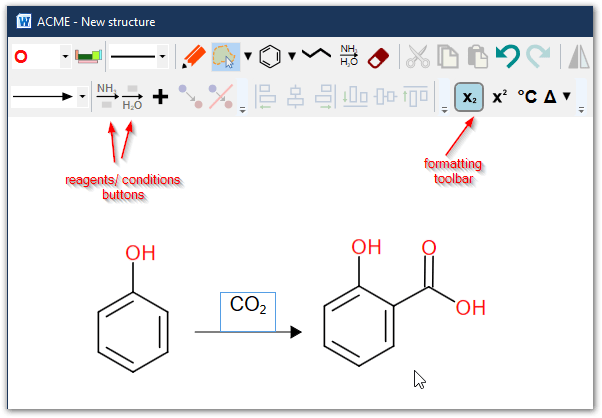
Use the formatting/special characters toolbar to add superscripts, subscripts or special symbols.

N.B: any text typed into either of these fields is stored as simple formatted text. ACME makes no attempt to ‘semanticise’ the text into reagents, solvents or other chemical entities.

Cleaning Things Up.

Chances are, your drawing now looks a little wonky, since ACME uses free placement of structures and other objects.

No worries! We’ve added special alignment tools to neaten your drawings. You can align to tops, bottoms, right or left edges, or middles of the objects.

To align:

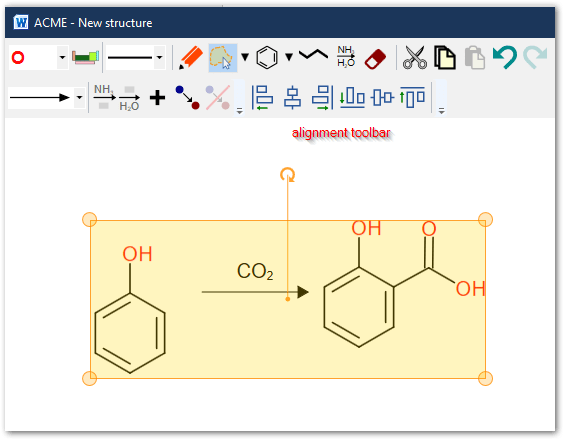
Select the objects you want to align. ACME now enables the Alignment toolbar.

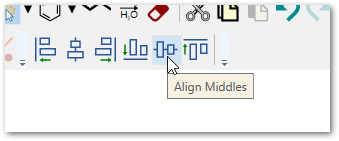
Now click the Align Middles button

ACME aligns the vertical centres of all objects

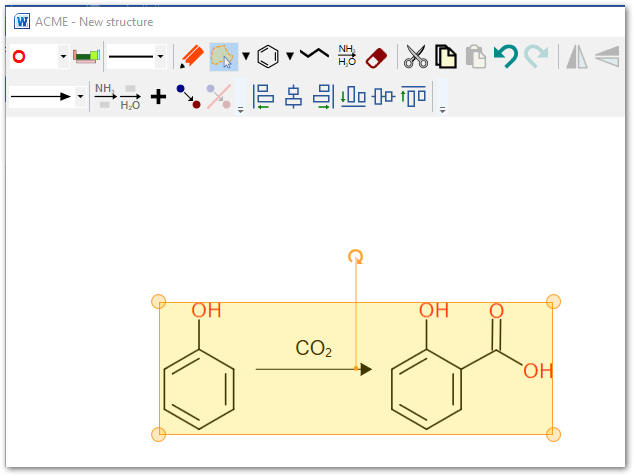
You can align bottoms, tops or edges if you wish using buttons from the same toolbar.
Well done! You have just drawn your first reaction in Chem4Word!

Please contact us if you have any constructive suggestions!

Share this:

  • Click to share on LinkedIn (Opens in new window) LinkedIn
  • Click to share on Facebook (Opens in new window) Facebook
  • Click to share on X (Opens in new window) X
  • Click to email a link to a friend (Opens in new window) Email

Filed Under: Tutorials Tagged With: drawing, Edit structure, reactions, Tutorial

Tutorial 4 – Using the Chemistry Navigator in Chem4Word

21st January 2017 by Andy Wright

This video tutorial shows you how to use the Chemistry Navigator in the Chem4Word addin.

Here’s the video

Step-by-step

  • You can click the Chemistry ribbon’s “Navigator” button to see all of the chemistry in a Microsoft Word document.
  • Users can choose whether to show structures or chemical formulae in the Navigator.
  • Using the Navigator, you can insert linked or unlinked copies of any chemistry into the document.
  • You can choose how these linked copies are displayed in a document;.
  • Chemistry can be displayed as 2D Structures, Chemical Names,Chemical Formulae or any other labels you have created.
  • Users can update all of the linked copies of a chemistry object by editing one of the copies.
  • You can select any chemistry in a document and change the way it is displayed using the View button in the Chemistry ribbon,

You now know how to use the Chemistry Navigator to insert linked copies of chemistry and how to change how these are displayed in your Word documents!

Learn more

There are other ways to reuse structures that you’ve already drawn.  The next tutorial will shows you how to use the Chemistry Gallery to re-use chemistry in other Word documents..

Get your copy of the Chemistry Addin for Microsoft Word from the download page.

«Tutorial 3 – Add a structure from PubChem to a document using Chem4Word

Share this:

  • Click to share on LinkedIn (Opens in new window) LinkedIn
  • Click to share on Facebook (Opens in new window) Facebook
  • Click to share on X (Opens in new window) X
  • Click to email a link to a friend (Opens in new window) Email

Filed Under: Tutorials Tagged With: Add Structure, Depiction, Navigator, Tutorial

Tutorial 3 – Add a structure from PubChem to a document using Chem4Word

6th January 2017 by Andy Wright

This video tutorial shows you how to add a structure from a PubChem search to a Microsoft Word document using the Chem4Word addin.

Here’s the video

Step-by-step

  • Clicking the Chemistry ribbon’s “Import” button allows us to search PubChem for structures, rather than having to draw them manually.
  • Type a seach term, such as a common name or IUPAC name for the chemistry you want to include in the document.
  • Select the correct compound from the list of results from the search.
  • Click the OK button and Chem4Word will search ChemSpider to see if we can find a name for your structure, that you can use that name elsewhere in your document;  we’ll show you how in a separate tutorial.
  • Edit the structure if you want to remove excessive hydrogen atoms that may have been drawn.  Sometimes, structure files in PubChem represent all hydrogen atoms explicitly,

You now have your first structure from PubChem in your Microsoft Word document!

Learn more

We can show chemistry as 2D structures, formulae or chemical names.  The next tutorial shows you how to change the way that chemistry is represented in Microsoft Word documents that were created using the Chem4Word addin.

Get your copy of the Chemistry Addin for Microsoft Word from the download page.

«Tutorial 2 – Edit a structure in a document using Chem4Word
Tutorial 4 – Using the Chemistry Navigator in Chem4Word»

Share this:

  • Click to share on LinkedIn (Opens in new window) LinkedIn
  • Click to share on Facebook (Opens in new window) Facebook
  • Click to share on X (Opens in new window) X
  • Click to email a link to a friend (Opens in new window) Email

Filed Under: Tutorials Tagged With: Add Structure, PubChem, Tutorial

Tutorial 2 – Edit a structure in a document using Chem4Word

6th January 2017 by Andy Wright

This video tutorial shows you how to edit an existing structure in a Microsoft Word document using the Chem4Word addin.

Here’s the video

Step-by-step

  • Double-clicking a structure will open a structure editor in which you can edit your structure.
  • You can edit the currently selected structure by clicking the “Edit” button on the Chemistry ribbon.
  • Click the OK button and Chem4Word will search ChemSpider to see if we can find a name for your structure, that you can use that name elsewhere in your document;  we’ll show you how in a separate tutorial.
  • Edit the name that was found or just leave it as it is

You now have edited your first structure in your Microsoft Word document!

Learn more

We can add structures to documents in other ways.  The next tutorial shows you how to add chemistry from a Pubchem search.

Get your copy of the Chemistry Addin for Microsoft Word from the download page.

«Tutorial 1 – Draw a structure in a document using Chem4Word
Tutorial 3 – Add a structure from PubChem to a document using Chem4Word»

Share this:

  • Click to share on LinkedIn (Opens in new window) LinkedIn
  • Click to share on Facebook (Opens in new window) Facebook
  • Click to share on X (Opens in new window) X
  • Click to email a link to a friend (Opens in new window) Email

Filed Under: Tutorials Tagged With: Edit structure, Tutorial

Tutorial 1 – Draw a structure in a document using Chem4Word

6th January 2017 by Andy Wright

This video tutorial shows you how to draw a structure in a Microsoft Word document using the Chem4Word addin.

Here’s the video

Step-by-step

  • Clicking the Chemistry ribbon’s “Draw Structure” button to open a structure editor in which you can draw your structure.
  • Click the OK button and Chem4Word will search ChemSpider to see if we can find a name for your structure, that you can use that name elsewhere in your document;  we’ll show you how in a separate tutorial.
  • Edit the name that was found or just leave it as it is

You now have your first structure in your Microsoft Word document!

Learn more

There are other ways to add a structure to a Microsoft Word document using the Chem4Word addin, and we’ll show you these over the coming weeks. The next tutorial shows you how to edit existing structures in Microsoft Word documents that were created using the Chem4Word addin.

Get your copy of the Chemistry Addin for Microsoft Word from the download page.

Tutorial 2 – Edit a structure in a document using Chem4Word»

Share this:

  • Click to share on LinkedIn (Opens in new window) LinkedIn
  • Click to share on Facebook (Opens in new window) Facebook
  • Click to share on X (Opens in new window) X
  • Click to email a link to a friend (Opens in new window) Email

Filed Under: Tutorials Tagged With: Draw structure, Tutorial

Recent Posts

  • Chem4Word – V3.3.10 Release 8
  • Why Should I Use Chem4Word?
  • SketchEl file support now included in V3.3
  • Improved Chemical Libraries are live in Chem4Word!
  • Draw Chemical Reactions Easily and Quickly with Chem4Word!

Archives

  • February 2025
  • July 2023
  • June 2023
  • March 2023
  • December 2022
  • November 2022
  • October 2022
  • March 2022
  • September 2020
  • August 2020
  • December 2018
  • April 2017
  • January 2017
  • December 2016
  • September 2016
  • December 2015
  • Privacy Policy – Chemistry Add-In for Microsoft Word
  • About Us
  • Contact Us
  • Cookie Policy (UK)

Copyright © 2025 · "Supported by the .NET Foundation" · Log in

Manage Cookie Consent
We use technologies like cookies to store and/or access device information. We do this to improve browsing experience and to show (non-) personalised ads. Consenting to these technologies will allow us to process data such as browsing behaviour or unique IDs on this site. Not consenting or withdrawing consent, may adversely affect certain features and functions.
Functional Always active
The technical storage or access is strictly necessary for the legitimate purpose of enabling the use of a specific service explicitly requested by the subscriber or user, or for the sole purpose of carrying out the transmission of a communication over an electronic communications network.
Preferences
The technical storage or access is necessary for the legitimate purpose of storing preferences that are not requested by the subscriber or user.
Statistics
The technical storage or access that is used exclusively for statistical purposes. The technical storage or access that is used exclusively for anonymous statistical purposes. Without a subpoena, voluntary compliance on the part of your Internet Service Provider, or additional records from a third party, information stored or retrieved for this purpose alone cannot usually be used to identify you.
Marketing
The technical storage or access is required to create user profiles to send advertising, or to track the user on a website or across several websites for similar marketing purposes.
Manage options Manage services Manage {vendor_count} vendors Read more about these purposes
View preferences
{title} {title} {title}